Charm Quilts — Making the First Cut

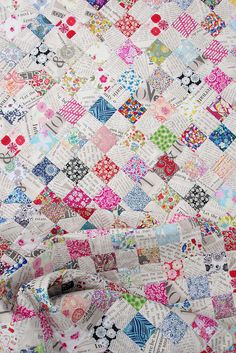
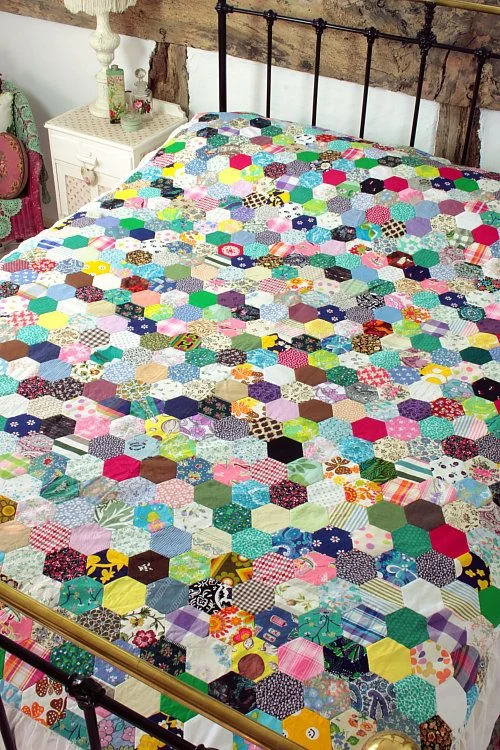
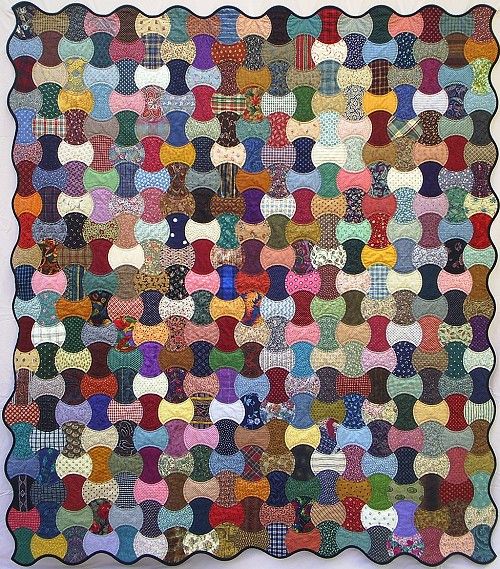
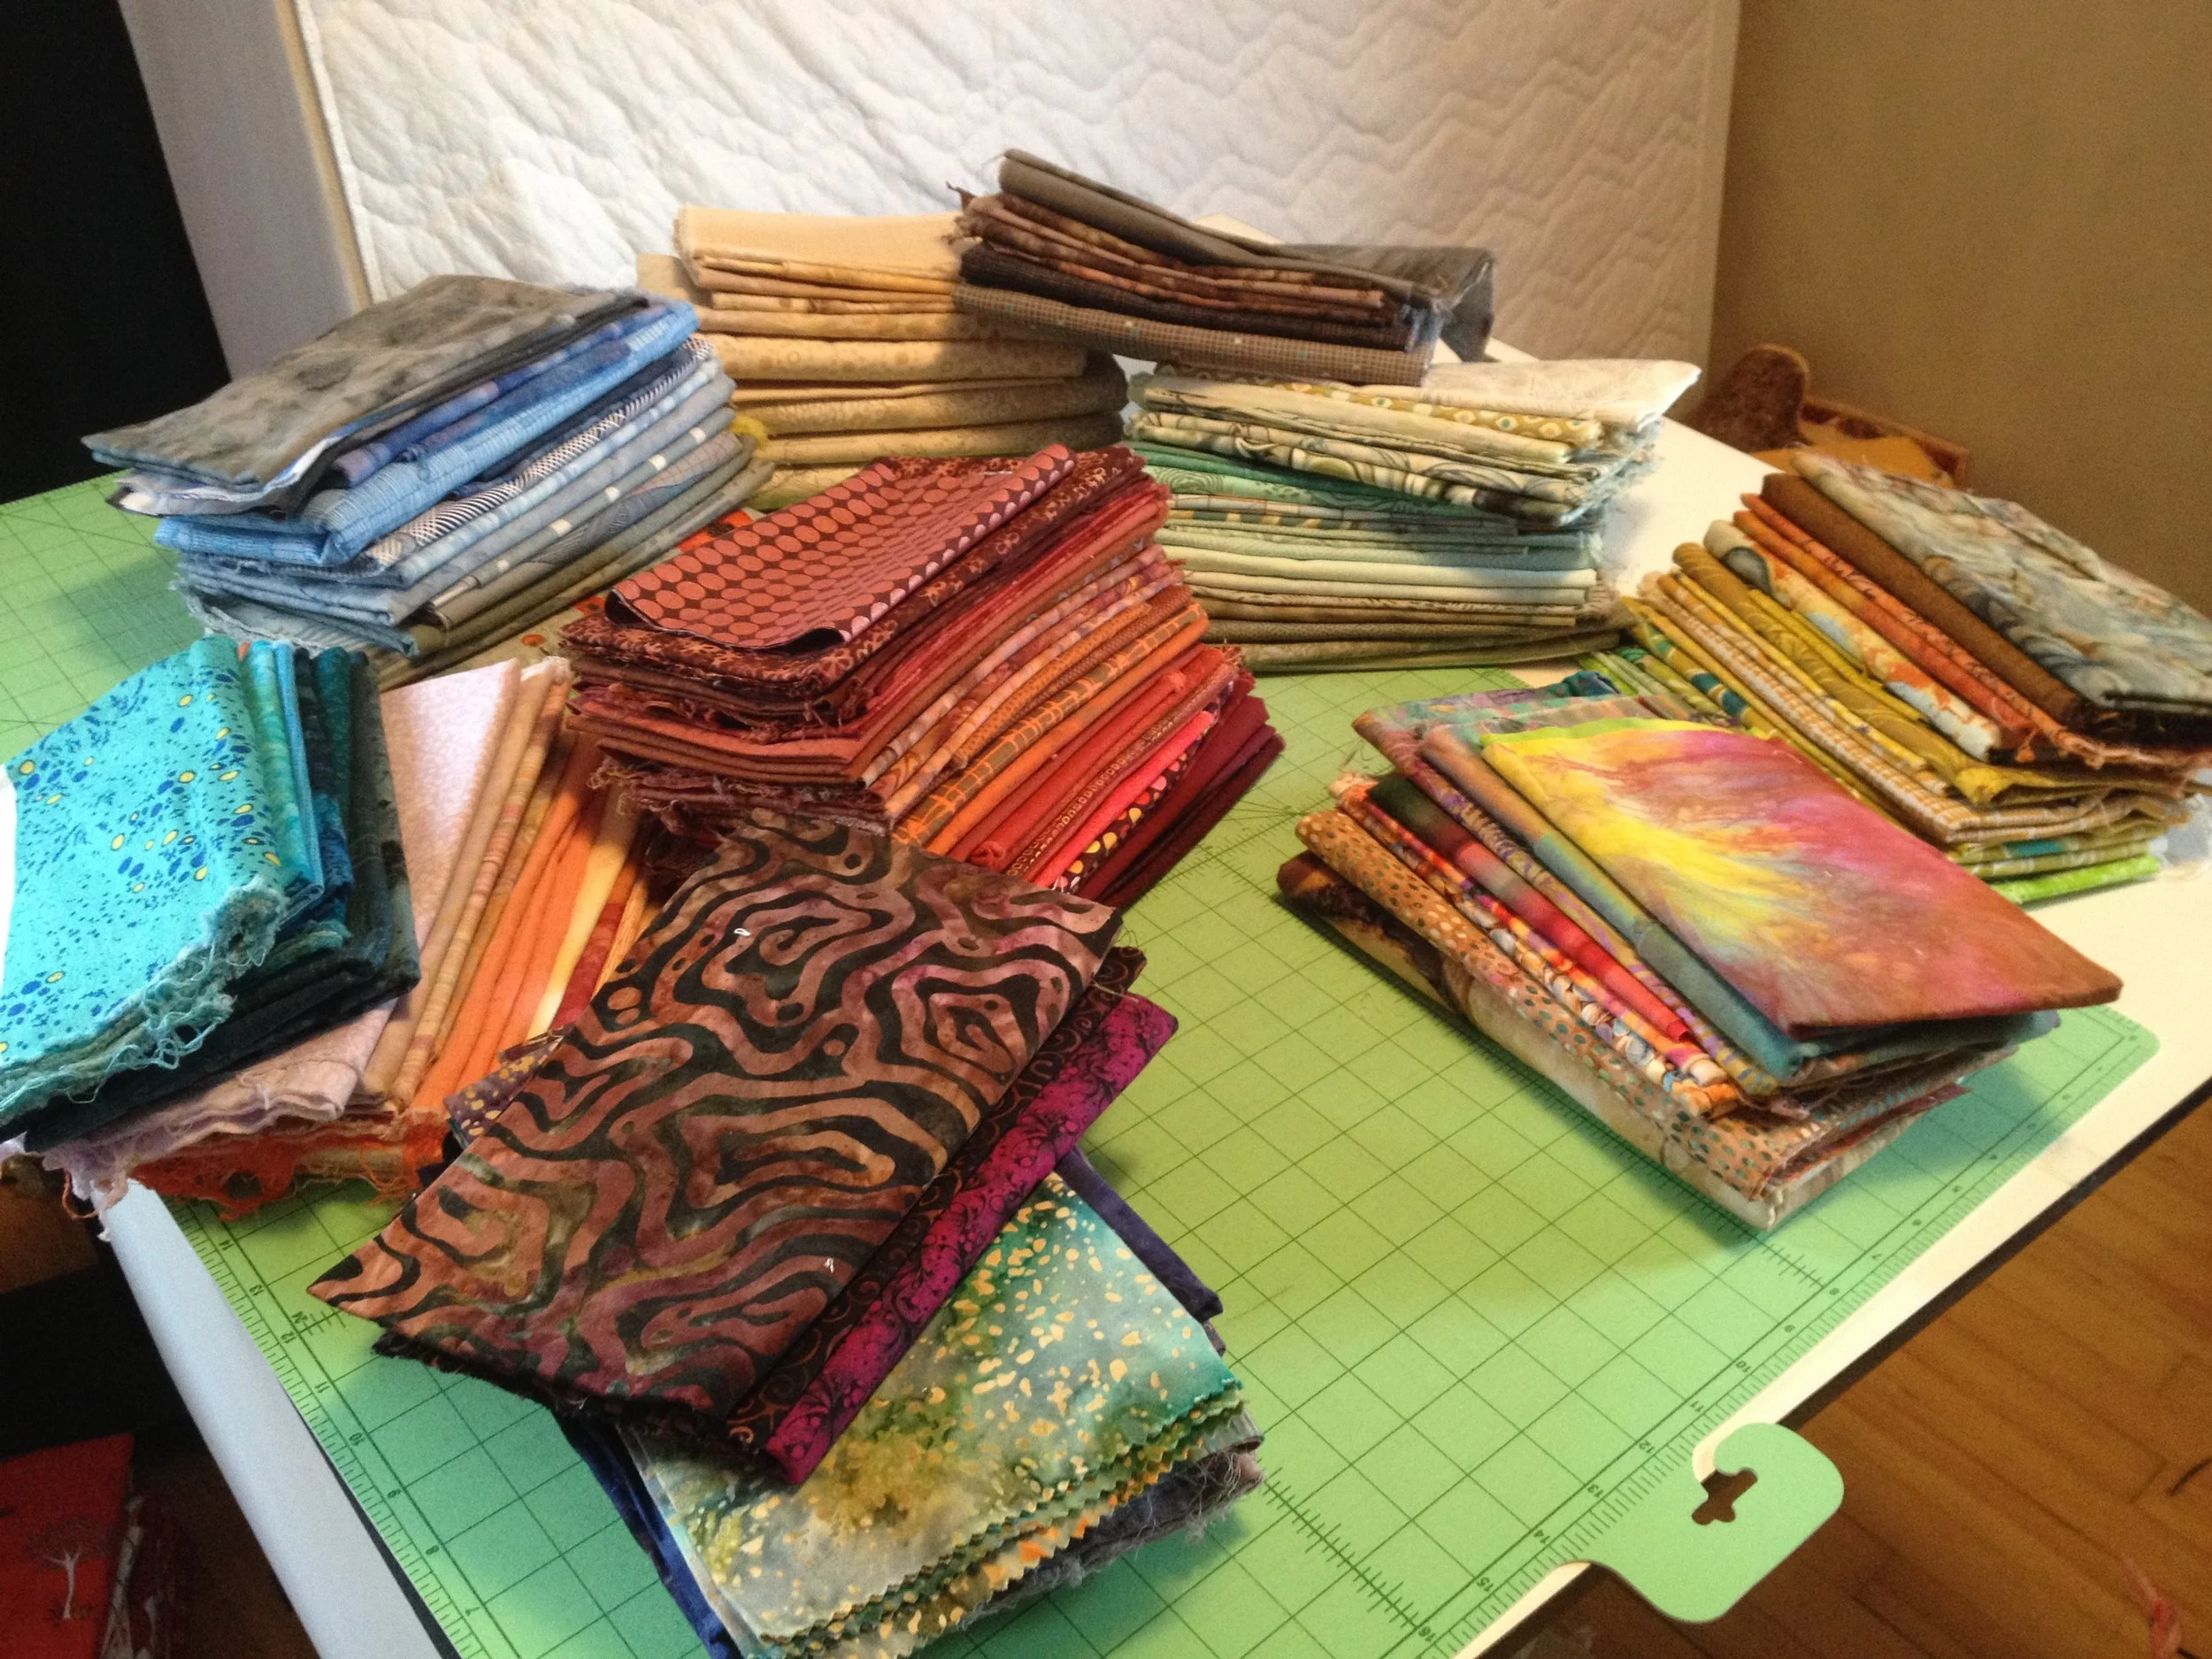
Have you decided what form you'd like your charm quilt to take?? Started pulling some fabrics to cut into and get plastered on your design wall? This post will give a few pointers on techniques for slicing just a little bit from a whole lot of different fabrics. 

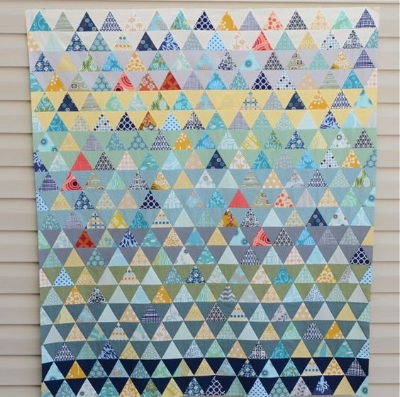
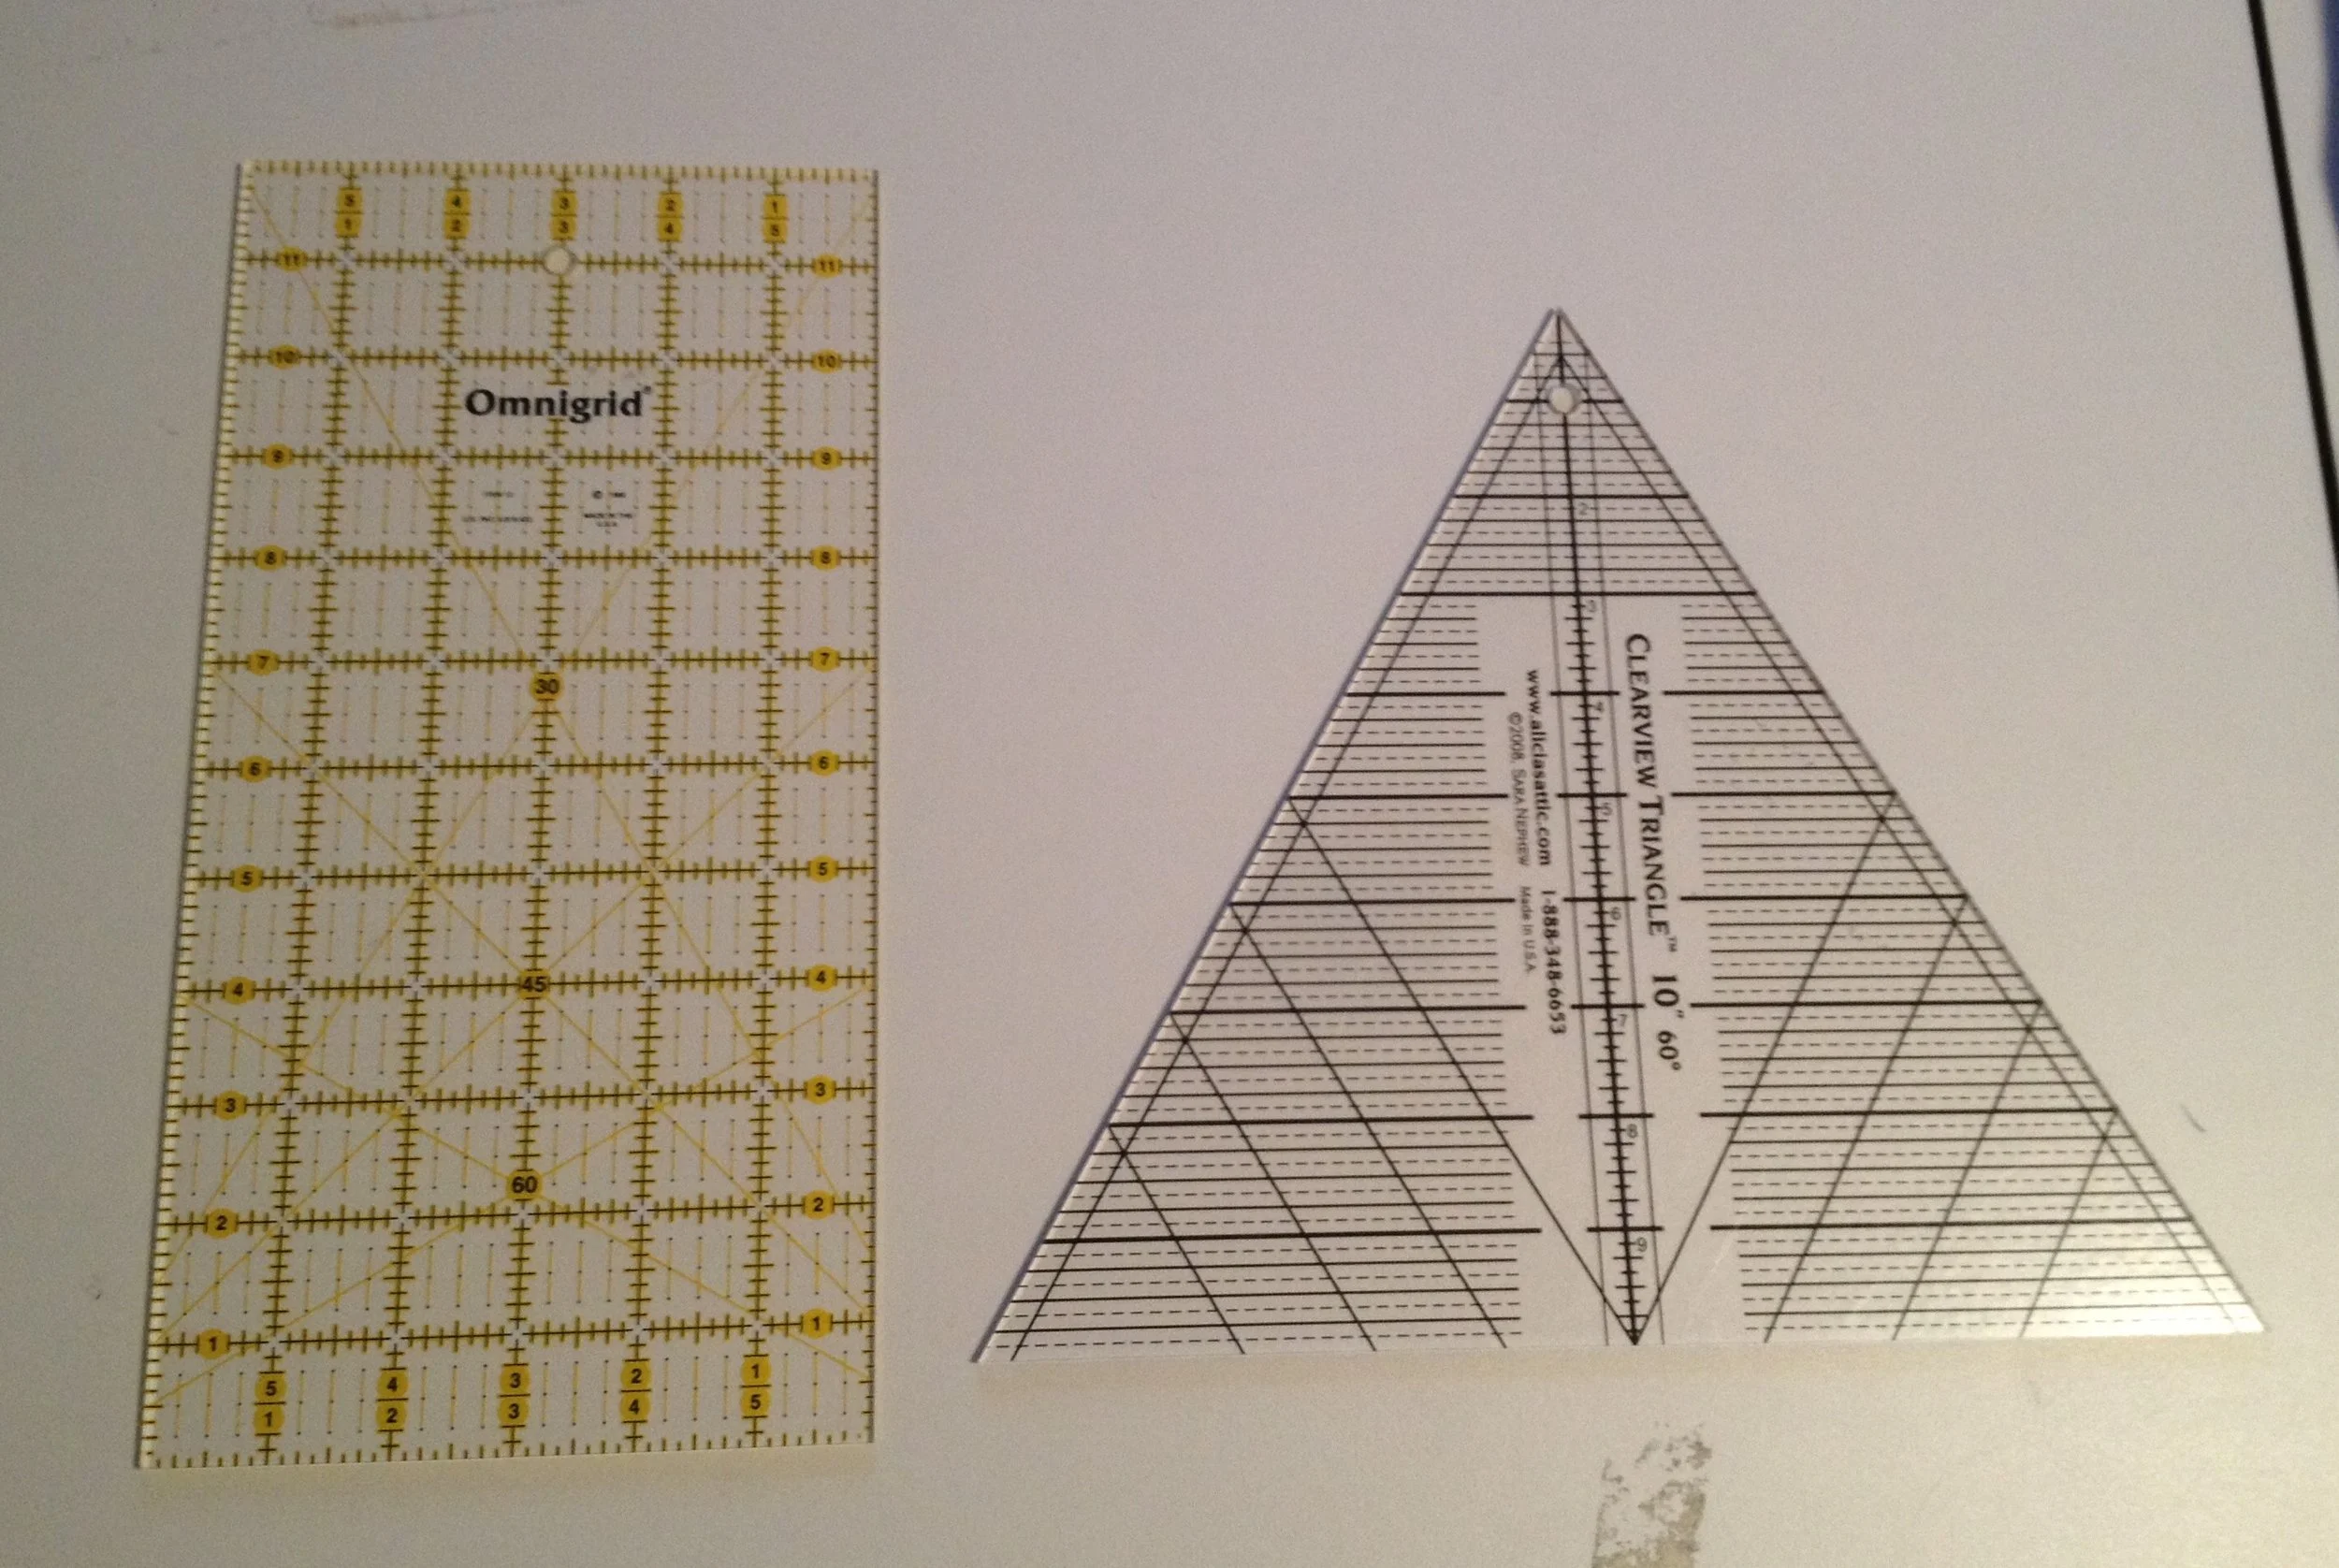
I'll start by making the assumption that there's no need for me to go over rotary cutting for squares or rectangles. Chances are, if you're a blog-reading quilter, you've got that one down. So let's jump to triangles. For 60° (equilateral) triangles I use either my 6" x 12" Omnigrid ruler or the handy-dandy Clearview Triangle 60° tool by Sarah Nephew. These same tools can help for cutting parallelograms as well.

FullSizeRender.jpg
Those angle markings are great for this, but just be sure you're measuring from the correct side of the ruler — it does sometimes make a difference.

Those angle markings are great for this, but just be sure you're measuring from the correct side of the ruler — it does sometimes make a difference.

Below is a quick look at cutting a triangle using the standard rectangular rotary ruler, followed by the super-easy demo with the triangle ruler.

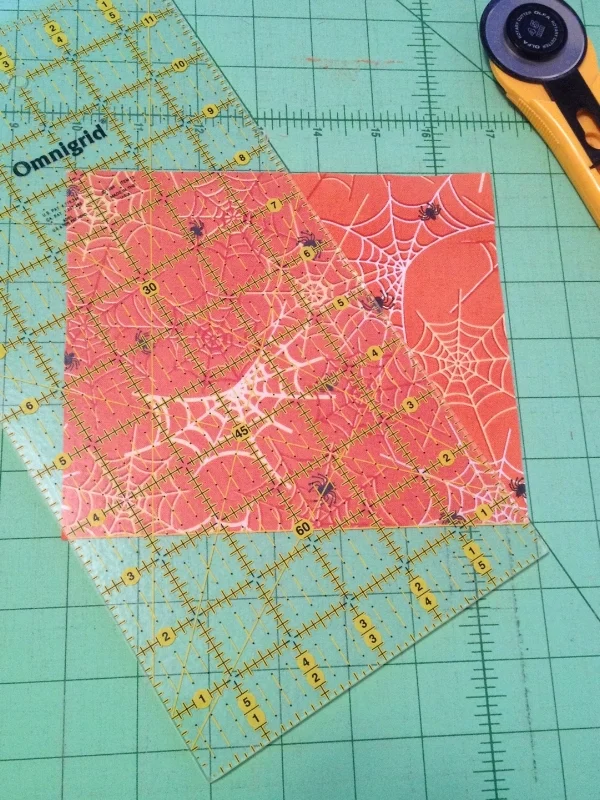
My goal triangles are cut at 6" tall (convenient with the Omnigrid 6" wide rulers, but I could have gone smaller or bigger, just takes a bit more math). To start, I tested against my gridded cutting mat to see what the base length would be if I go with a triangle the size I was considering; turns out it would be 7".

When the 60° line is placed along the "base" or outer edge, you can see that the length ends up at the 7" mark on the mat. Again, this is assuming I am cutting the exact width of the 6" ruler. If you want 4" instead, move the ruler so that where the…

When the 60° line is placed along the "base" or outer edge, you can see that the length ends up at the 7" mark on the mat. Again, this is assuming I am cutting the exact width of the 6" ruler. If you want 4" instead, move the ruler so that where the 60° line and the 2"/4" line connect matches the corner at 0 on the cutting mat. Your base will be the length to the edge f the ruler just as in this photo it hits at the 7 on the cutting mat.

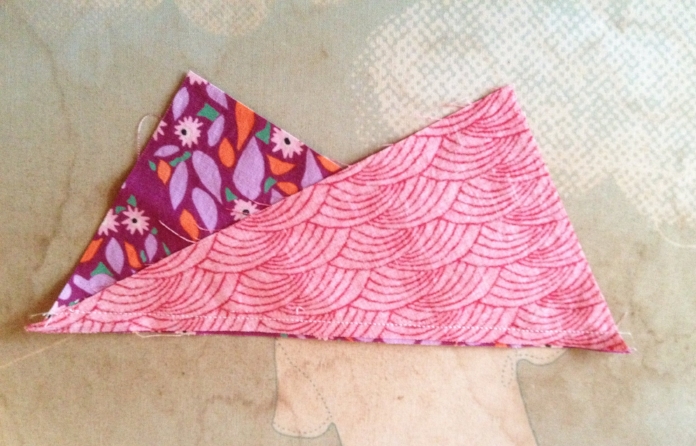
So then I cut a 6"x 7" rectangle from my fabric. Place the 60° line across the 7" base of the rectangle from one corner to the center of the opposite side and cut along the edge. Then I flipped the piece of fabric once clockwise, placed the same 60° line along the newly cut edge, so the edge of the ruler should meet to opposite corner. 

If you have the tool below (or something comparable) it's easier to cut just a single piece from your fabric stash without cutting out a rectangular piece from it first.

On this ruler, the number at the base is actually the height of the triangle, so if you are going for 6" tall, as I am, use the line for 6.

On this ruler, the number at the base is actually the height of the triangle, so if you are going for 6" tall, as I am, use the line for 6.

For anything more complex I move directly to templates. For drawing your own, you can use a mid-weight to heavy card stock, mat board, or a thin template plastic, plus a ruler, pencil and Sharpie. When drawing a template, I prefer to start by drawing the size I want the finished piece to be, then add the 1/4" seam allowance guide around it before cutting out the template. It just helps me envision things better if I can see the outline of my goal. Here are some tips on how I approach this step.

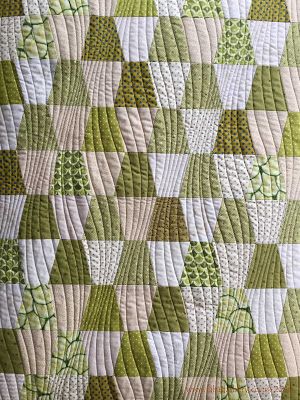
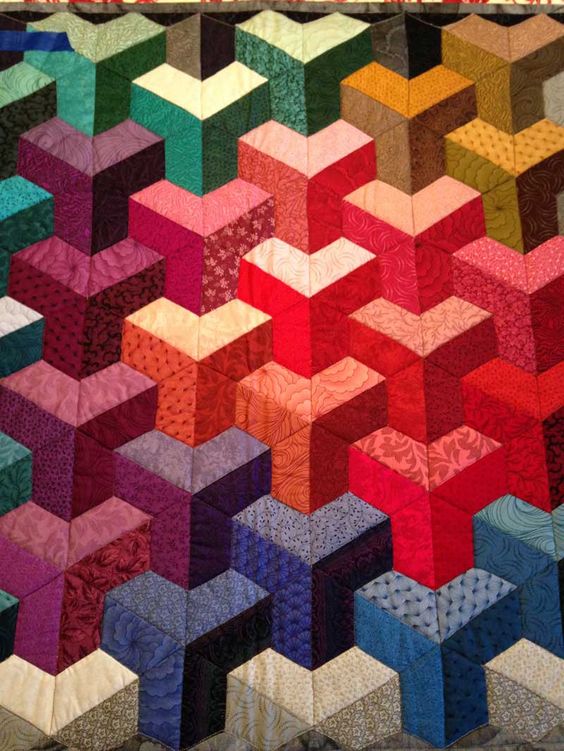
Above is a selection of some of the options for shapes and orientations of similar shapes that can be done by making your own template. Tall isosceles triangles (2 sides same length, 1 side different), or various trapezoids, either squat or slim and tall, for instance. 

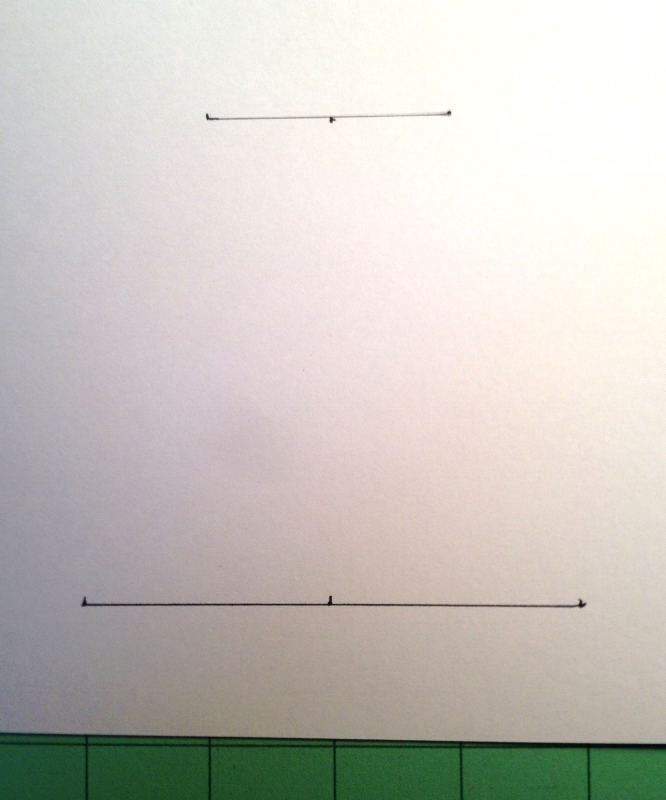
My approach is pretty loosey-goosey to begin with, but then follows some rules. I'll start by deciding how long I want the base of the shape to be. Let's draw a trapezoid to illustrate, and start with a 4" base:

I mark the outside points, as well as the mid-point on the line. Next, I choose what height I want it to be, and measure straight up from the mid-point, perpendicular to the first line. In this case I chose to also have it 4" tall.

And it seemed to be a pleasant proportion to make the top of the trapezoid 2" wide, which means taking that mid-point marking and extending a line 1" in each direction.

Sorry for the terrible lighting and shadow on these photos.., hopefully the lines are clear enough to see!

Sorry for the terrible lighting and shadow on these photos.., hopefully the lines are clear enough to see!

And then it's just a matter of connecting the dots!

And don't forget to add your 1/4" seam allowances before cutting out your template!!

In theory, you should be able to take the principles of how I drafted this template and apply to most one-patch-friendly shapes. The measurements can be relatively arbitrary as long as they are consistent and the angles fit together when pieced side by side.

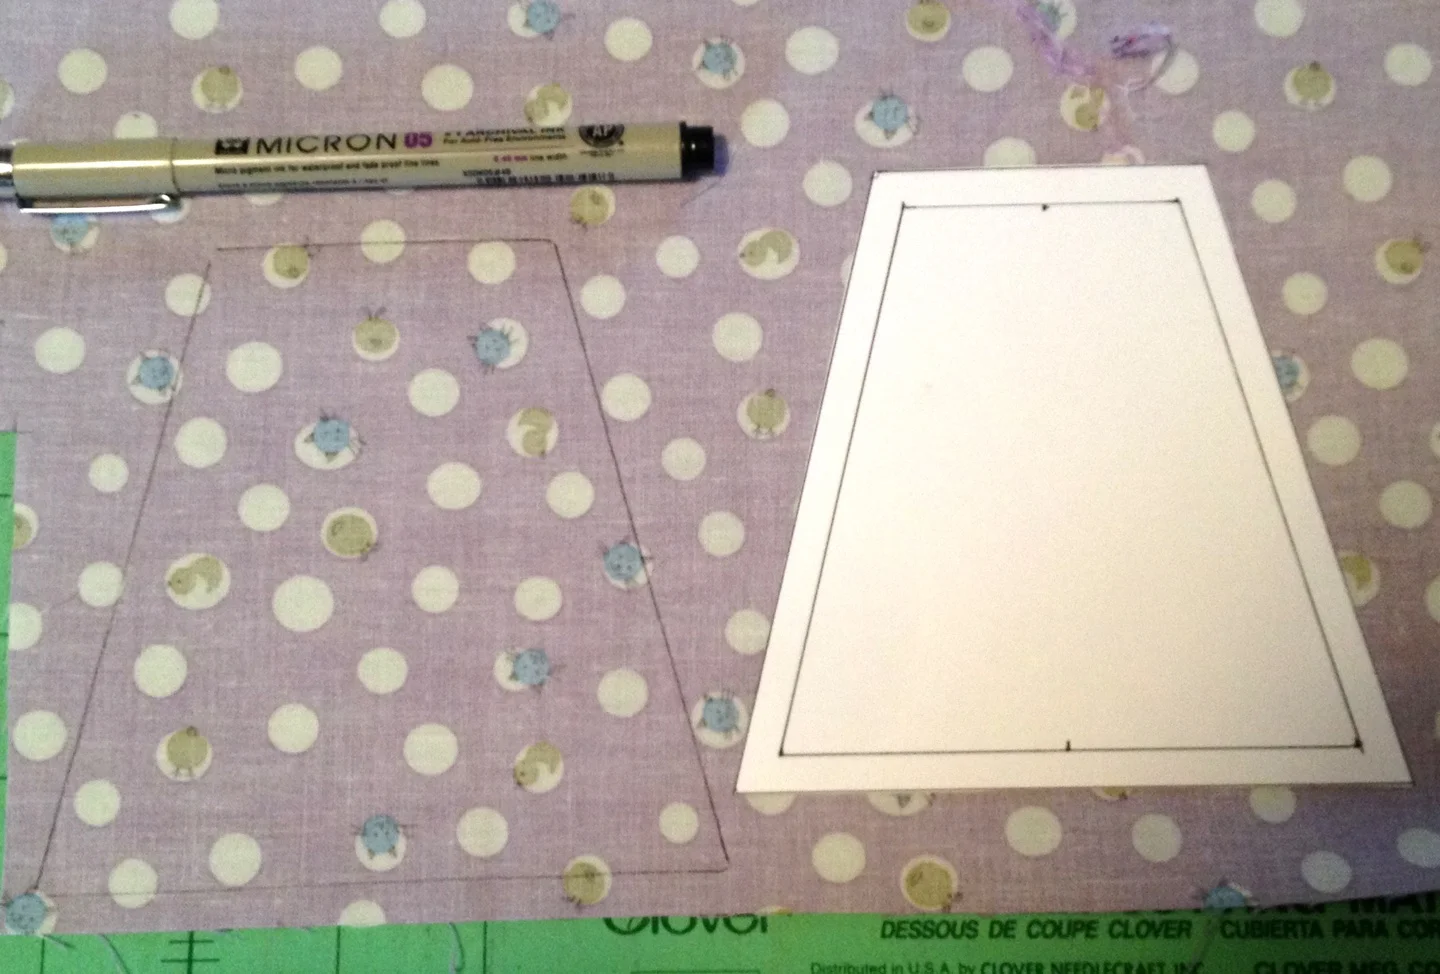
This template can now be used as a marking gauge for all of your fabrics. I alternate between my ceramic chalk mechanical pencil (for darker fabrics), a water-soluble blue marking pen, or for this purpose, since we're marking our actual cutting line, even a permanent Sigma Micron pen works well.

Whew! That's a lot of photos for something that hopefully isn't all that complicated! So, let's get to this! In the next week or two let's see if we can get a minimum of 40 patches cut out. If you're confident with starting to piece them together and want to jump in there, be my guest, though there will be updates along the way to go step-by-step for that.

Leave a comment below, post to instagram using our #yacqal hashtag and let's see what everyone has decided to make!! I can't wait to see all of the fun, different tastes!!

You're a Charm Quilt-Along — Let's Begin!

It's time to get this party started! But how, you might ask? It begins with just stepping back and taking a look at your fabric stash, whether it's all shelved together or spread out among different bins, sorted by color or by collection. Take it in and think about how you want to use it. Do you want to go through in a methodical way cutting a piece from each fabric working your way through stacks? Are you currently working on an unrelated sewing or quilting project that you can cut patches from as they are already out on your cutting mat? Are you thinking of using smaller patches and going to raid your scrap bins first? What comes to mind when you gaze at your fabrics?

Just a portion of my stash... thinking about color and distribution.

Just a portion of my stash... thinking about color and distribution.

Also think about what general size you'd like to use for your patches. This will not only dramatically affect the character of the finished quilt, but will make a difference in how many fabrics you will need. I have to admit I am not counting as I go (so far), but then I know I can choose from my stash without doing any repeats and have enough fabric to make 5 different quilts (a guess, but a reasonable one)! If you aren't a hoarder like I am, this is something to take into account. 1.5" hexies are a great design element, but will require many more patches than if you do 6" equilateral triangles.

Personally, I think I am going to work on 2 different quilts during this QAL and my approach to fabric selection will be different. As some of you may already be familiar, I LOVE me a good color wash quilt! The flow of color and value across the whole thing is an inspiration to me. So I am thinking that my 1,000 Pyramid quilt will be a steady wash of warm hues: oranges, yellows, reds and maybe some lime green. For my tumbler quilt I am still giving it thought. I want to go scrappy, but am undecided whether I plan to do a complete mash-up of color and print or take a more planned approach with contrasting colors alternating throughout. The process will help me figure that out. 

IMG_5505.JPG

One discipline that this will bring up for me, and I imagine I'm not alone here, is the intention of cutting into even the "precious" fabrics in my stash. If you've been quilting and collecting fabric for as long as I have you no doubt have several pieces that you love SO much you only use them sparingly, or sadly sometimes not at all. What a shame to find a print so unique that you're afraid to no longer have it available so it never ends up in any project at all! Let's all agree to break free of that, if even with just one print. Be sure to include one or more of these "precious" fabrics in your first stack of fabrics when you begin cutting. You'll be glad you're getting some use from it and it will continue to be a favorite, so enjoy it in something you make!

Some examples of just a few of my "precious" fabrics. I will be sad when I use them up, but I'd be more so if I never used them at all.

Some examples of just a few of my "precious" fabrics. I will be sad when I use them up, but I'd be more so if I never used them at all.

The next big thing to consider is what block choice you would like to work with for this quilt. In my last post leading up to this QAL I presented a variety of some of the more common shapes often used in one-patch charm quilts. If you haven't seen that post, you can find it here or go to the Quilt-Along page from the top navigation bar on the website. As I've mentioned, I intend to work on both a 1,000 pyramid quilt using equilateral triangles (I do love the triangle quilts!) and a tumbler quilt (trapezoids), which will be a first for me. In both cases I am going with medium to larger scale (4" base on tumblers, 6" height on triangles).

My next post later this week I'll show some techniques on cutting using standard rotary rulers and drafting templates on card stock for tracing. There are also commercially available templates for various one-patch shapes. Here are just a couple sources available:

One-derful One Patch Templates by Marti Michell

Perfect Patchwork Templates by Marti Michell

Trace 'n Create Quilt Templates with Nancy

IMG_5491.JPG

Another approach for those of you who prefer hand-work is using an English Paper Piecing (EPP) method. Various sizes and shapes available.

Paper Pieces - precut paper shapes for EPP

So, are we ready to jump in?? One thing I will be playing around with for this QAL is setting up inLinkz so we can do a share of progress and prompts. I'm still trying to figure that one out, so it may take a couple of posts before it is up successfully, but I do want you all to share your process with us here. If a link-up is not available at the bottom of the post, then please leave a comment with any links to your own blog or instagram. Let's start with pictures of your stash from which you're working and/or a picture of any of those "precious" prints you're willing to cut into and include in your charm quilt. Use the hashtag #YACQAL on IG so we can keep it all together. AND the more times you link up the more chances you have of winning the give-away down the road!

Still have questions about how to begin? Let me know and I'll do my best to help out!

One-Patch, Many Options — YACQAL #3

Okay, so this will likely be the last of my preliminary posts leading up to the launch of my first ever quilt along: You're a Charm Quilt-Along! If those ideas aren't swimming yet, hopefully this will help kick them into gear so you have a plan for beginning in just a couple of weeks.

And if you haven't already, add this blog to your reading list so you don't miss the launch or any of the installments once we get going! I'll also try to post notices via instagram on @surroundedbyscraps  and on my Surrounded by Scraps Facebook page (this will definitely be a social-media learning experience for me!)

So far I've offered a little bit on the background and concept behind charm quilts, and today I'll be presenting a list and examples of some of the most common shapes to be found in one-patch charm quilts. Let's start with defining a one-patch quilt: A patchwork quilt where each piece is a uniform shape and size. Pretty straight forward. Now, for it to work properly, those shapes need to fit together into an overall pattern that maintains a flat plane. There are LOTS of shapes from which to choose.

Squares/Rectangles

We'll start simple. We can all picture quilts made up of the same sized squares or same sized rectangles all over, from postage stamp quilts (traditionally 1"-2" max. squares throughout), to brickwork patterns with larger rectangles to showcase bold prints. And of course, the contemporary use of the term charm quilt fits into this category, using commercially manufactured 5" charm pack squares pieced together.

An Amish wool 1-patch. Click image for source.

An Amish wool 1-patch. Click image for source.

Checkerboard quilt by Red Pepper Quilts. Click image to read her blog post on it! 

Checkerboard quilt by Red Pepper Quilts. Click image to read her blog post on it!


Scrappy Rectangles by KatyQuilts. Click image for her original post.

Scrappy Rectangles by KatyQuilts. Click image for her original post.

Side Braid Quilt by Jeni Baker, via Flickr. Click for original image source.

Side Braid Quilt by Jeni Baker, via Flickr. Click for original image source.

Found on Pinterest, could not locate maker for credits.

Found on Pinterest, could not locate maker for credits.

Triangles/Diamonds/Parallelograms

Another common one-patch category. This is where we have the 1,000 Pyramid quilts, 60° diamonds, and more complex arrangements such as Seven Sisters and Tumbling Blocks (not to be confused with Tumblers, which come up in our next category). As with all of these quilts, the scale you choose for your shape will have a huge effect on how the finished quilt looks and feels. Larger patches are appealing for those with less of a stash to work with (or less time for piecing), but generally will look much more contemporary, not to say you can't get a very contemporary look with smaller pieces, as you'll see below.

Thousand Pyramid, found on Flickr via Pinterest - SurrendrDorothy.

Thousand Pyramid, found on Flickr via Pinterest - SurrendrDorothy.

Carnival Quilt by Ashley Newcome. If you click the image, you will find a whole bunch of great triangle quilts and a link to some free patterns!

Carnival Quilt by Ashley Newcome. If you click the image, you will find a whole bunch of great triangle quilts and a link to some free patterns!

Pyramid quilt by Hyacinth Quilts. Click image for her post.

Pyramid quilt by Hyacinth Quilts. Click image for her post.

Diamonds & Ice, by yours truly. (sorry for terrible photo)

Diamonds & Ice, by yours truly. (sorry for terrible photo)

The Little Red Hen, via Pinterest. Here we have what appears to be a true 1-patch tumbling block charm quilt!

The Little Red Hen, via Pinterest. Here we have what appears to be a true 1-patch tumbling block charm quilt!

Another tumbling block quilt, by ariane's crafts, via Pinterest.

Another tumbling block quilt, by ariane's crafts, via Pinterest.

Seven Sisters block by Q is for Quilter. Click for source.

Seven Sisters block by Q is for Quilter. Click for source.

An example of a Seven Sisters design, by Stephen Sollins, via Pinterest. 

An example of a Seven Sisters design, by Stephen Sollins, via Pinterest. 

Trapezoids (a.k.a. Tumblers)

And here we start getting into some of the traditional one-patch shapes that are harder to get without making (or buying) a template. The previous categories I tend to prefer using my rotary ruler and tools, but with the less common angles and sides that are no longer parallel, having a template to work from will save you much time and frustration. Take my word for that ;)

I'll Tumble for You, by Penny, Sew Take a Hike. On Flickr, via Pinterest.

I'll Tumble for You, by Penny, Sew Take a Hike. On Flickr, via Pinterest.

Modern Tumblers by Frances Meredith. Click image for source.

Modern Tumblers by Frances Meredith. Click image for source.

Half-hexagon Trapezoid. A little harder to create proper illusion with charms, but with the right color and value placements...

Half-hexagon Trapezoid. A little harder to create proper illusion with charms, but with the right color and value placements...

Scrapapalooza 1-patch. I love her process blog post on Quilting is More Fun than Housework. Click image for post.

Scrapapalooza 1-patch. I love her process blog post on Quilting is More Fun than Housework. Click image for post.

Hexagons

We've all seen the hexie craze take over, and sure enough this is a natural fit for a one-patch quilt. And there are many methods for getting those hexes made, whether pieced using Y-seams, English Paper Pieced (EPP), or as a combo of smaller triangles (which is effective, but one has to be careful when combining with a charm quilt). There are also several different scales and "shapes" of hexagons that work as a one-patch.

Vintage Hexagon quilt, maker unknown, via Pinterest.

Vintage Hexagon quilt, maker unknown, via Pinterest.

Stretched Hex, by Victoria Findlay Wolfe. Templates on her website, just click the image.

Stretched Hex, by Victoria Findlay Wolfe. Templates on her website, just click the image.

My Blue and White, by Prosivana Deka. Large, bold, pieced hexagons.

My Blue and White, by Prosivana Deka. Large, bold, pieced hexagons.

By Inspired by Vintage, via Pinterest.

By Inspired by Vintage, via Pinterest.

Apple Cores/Clam Shells

Now we enter into curves, curves that nestle together just so. There's no doubt some mathematical formula for getting these just right, but again, I would go with finding a template for one of these guys. Piecing curves is not my strong-suit, but they can be so beautiful and effective all together!

Jumbo Applecore, by Thimbleanna. Click image for source.

Jumbo Applecore, by Thimbleanna. Click image for source.

Apple core color wash, maker unknown.

Apple core color wash, maker unknown.

Double Hammerhead 3, maker unknown. Via Pinterest.

Double Hammerhead 3, maker unknown. Via Pinterest.

Large scale Clam Shell using Anna Maria Horner, by Melissa at My Fabric Relish. Click image for original post.

Large scale Clam Shell using Anna Maria Horner, by Melissa at My Fabric Relish. Click image for original post.

An alternate layout for clam shell. From Accuquilt, via Pinterest.

An alternate layout for clam shell. From Accuquilt, via Pinterest.

Neon and Neutral II, by Latifah Saafir. On flickr. One of my favorites!

Neon and Neutral II, by Latifah Saafir. On flickr. One of my favorites!

There are others much less common, and with a good internet search you can find them, but I thought this gave a good selection of shapes from which to get inspired. I found Pinterest to be an invaluable resource for finding all kinds of samples, and have compiled a selection into a board called One-Patch Quilt Ideas. And in case there is any question, you are invited to work with any shape you like... you don't even need to do a one-patch to join the YACQAL, but my demos will focus on one-patch, while I try to show a couple of different techniques for marking, cutting and piecing shapes as we go.

Oh, and have I mentioned that there will be a sweet little giveaway when all is said and done?? More details on that will be revealed at the launch , but let's just say I'm looking forward to connecting with more of you and seeing what we can create in our own styles from the same prompts. Again, follow my blog, instagram and/or FB page to keep up to date on this fun adventure we're about to have!

A Quilting Adventure!

In less than 2 weeks I will be heading down the coast to join my mom for a quilting class. We're signed up to take a class from Jean Wells at Empty Spools Seminars, more commonly known by its venue name, Asilomar Conference Center in Pacific Grove, CA.

Not only will this be my first time taking a class with Jean Wells (and the irony is not lost on me that I live in the same state as one of the top contemporary quilt artists and teachers but am traveling out of state for her class), but it will also be my first time at Asilomar. I am super-excited and a little apprehensive. My mom has attended Asilomar many times in the past and seems to always enjoy the experience. She has tried to get me to go with her time and again, but this is the first that I've come through. At least for this particular venue. 

The class for which we are signed up is entitled, "Exploring Your Own Personal Theme," and one goal is to work toward creating a quilt series based on said personal theme. It draws from the design principles and techniques that Jean puts forth in a couple of her books, most closely (to my knowledge) in "Intuitive Color & Design" and "Journey to Inspired Art Quilting."

IMG_5458.JPG

My biggest problem so far is that I just cannot seem to focus on or decide on a main theme. I started by going through photos I've taken over the last few years, many while traveling or on hikes, There are so many interesting shots that I think would translate into cool quilts, but one thing that I've learned about myself in my many years of artistic endeavors is that I tend to get quite literal in my interpretations. And for this class I do NOT want to be literal, or at least not literally pictorial. That requires too much detail, and I'm lazy. So I decided to steer away from landscape photos as my compositional inspiration. I think. Now color scheme is a whole other issue! And that leads me to a shout-out once again to Anne for her ever-so-helpful Palette Builder tool on her website play-crafts.com, and while you're there, she has a number of other great design tools available under the "tools" tab on the home page.

Brazil, 2004

Brazil, 2004

Clackamas River, 2014

Clackamas River, 2014

OR coast, 2015

OR coast, 2015

So then I started going back a little further and looked again at some of the images I created back in my CreativEntropy days, when I was studying photography at Oregon College of Art and Craft (OCAC). I am still fascinated by the wearing down of urban surfaces, the textures and colors that come out of the process. I'm not sure I'm prepared to create good quilt compositions based on those inspiration images, but that's what taking a class is all about, right? It's time to expand my experiences and let someone guide me into territory that I would otherwise find extremely daunting. 

IMG_5457.JPG

So now the task of gathering inspiration images, narrowing the theme I'd like to pursue, and pulling fabrics to take with me is at hand.

A few of the images above are not mine... there are 2 Edward Burtynsky and 2 Janet Little Jeffers.

A few of the images above are not mine... there are 2 Edward Burtynsky and 2 Janet Little Jeffers.

I actually collected even MORE piles before starting to go through and slim them down again. The task is still ongoing...

I actually collected even MORE piles before starting to go through and slim them down again. The task is still ongoing...

And there's still much narrowing that has to happen in order to get this stuff down to California for a week, especially keeping in mind my carry-on will be my sewing machine. 

Oh and bonus... not only will I be spending a few days after the workshop with one of my oldest friends and her family, but while in PG I have a date to meet up with one of my newer, online quilty friends for the second time IRL and I'm so looking forward to it!

A Little Charm Talk — YACQAL #2

I promised an entry giving a little more information about charm quilts, so here we go. I am not an historian and claim no expertise or special knowledge on this subject, but am more than happy to share what I have learned.

As I said in my previous post, the idea behind the charm quilt is that each piece used to make the quilt top is from a different fabric. Every single one (though there are anecdotes of quilts made from all different fabrics except 2 patches that are the same). Often they were collected over time, or traded with friends or penpals. Some are done using very specific color families in the prints, while others are a total hodge-podge of fabrics, and many use light and dark values to create an overall pattern.

A quilt top found by a volunteer at Fanshawe Pioneer Village. Click on image to learn more.

A quilt top found by a volunteer at Fanshawe Pioneer Village. Click on image to learn more.

Found in Step-by-Step Quilting... Click image for source.

Found in Step-by-Step Quilting... Click image for source.

Since most of the information I have on the subject I've gleaned from casual allusions over the years and looking up sources online, I am going to just list a couple of links to information I found helpful and interesting regarding charm quilts, and hope that you do too:

Re-posting the link to a couple of Barbara Brackman's entries on charm quilts: http://barbarabrackman.blogspot.com/2016/04/charm-quilts-and-odd-fellows.html  http://barbarabrackman.blogspot.com/2015/06/hattie-spragues-charm-quilt.html

Credited to collection of Pat Nickols.

Credited to collection of Pat Nickols.

Another good description I found of the background of charm quilts is this post on Womenfolk.com by Judy Anne Breneman: http://www.womenfolk.com/quilting_history/charm.htm

And one more, from Laurette Carroll on Antiquequilthistory.com: http://www.antiquequilthistory.com/a-history-of-charm-quilts.html

One of many gorgeous quilts found in the link above.

One of many gorgeous quilts found in the link above.

There is quite a bit of more information out there, but a lot of the material I found online when searching "charm quilts," especially looking for images, were merely contemporary quilts made using charm squares, and often do not actually follow the "rules" of the Odd-Fellows charm quilts. But I encourage you all to do your own searches and see what you find and what inspiration it sparks!

My next YACQAL post will talk about one-patch designs and common shapes used in charm quilts. I hope you all are getting as excited about this quilt along as I am!

You're a Charm Quilt-Along — an Intro

Last week I made an off-the-cuff comment on an instagram photo which seems to have resulted in the suggestion to start a quilt along (QAL). And I'm kind of jazzed about that!

IMG_5408.PNG

It's no secret that I have WAY more fabric in my possession than I will ever be able to utilize in projects. And I've also shared that recently I have not been terribly inspired creatively. Now, goodness knows I have plenty of WIPs, UFOs, abandoned class projects and quilt tops galore that need to be quilted, but none of those reignites a creative flame for me (though I have been chipping away at quilting some long overdue charity quilts!).

So when Jessica left a comment suggesting a QAL in response to my charm quilt idea, it gave me pause... and then I kind of got excited thinking about it. So I am hoping that this idea will excite many of you to join us starting in mid to late March for a charm quilt quilt-along, You're a Charm QAL (#YACQAL)

The idea is to use your own stash (or swap pieces if you need to broaden the basket... we might set up a way to facilitate that for those who would like) to make a charm quilt in the traditional sense of the term: a quilt (generally a one-patch) that only uses one piece of any one fabric - no repeats! This pre-dates fabric manufacturers putting together 5" charm square packs and other precuts from their fabric lines. This is the true sense of scrap quilting. Here is a link to a brief, yet informative, blog post on charm quilts by quilt historian Barbara Brackman.

Please excuse the lack of credit here... I thought I had saved the source, but can't seem to relocate it now. :( However, this appears to be an example of a late 19th C. tumbling block charm quilt.

Please excuse the lack of credit here... I thought I had saved the source, but can't seem to relocate it now. :( However, this appears to be an example of a late 19th C. tumbling block charm quilt.

In the coming week I'll put up a post with some examples of various charm quilts, ideas to get the juices flowing, but in the mean time check out this collection of charm quilts found on Pinterest, most of which seem to follow the original meaning of the term. Following that I'll work on outlining the general schedule for the quilt-along. Bear in mind I have never led a QAL before, so things may shift as we go, but I welcome feedback always. And more than anything else, I look forward to trying something new, having fun and seeing what you all come up with!

Stay tuned for #YACQAL!

Half-rectangle Triangles for Bliss Circle

Here's throwing together a slap-dash tutorial for a relatively common quilt block, but I just thought I'd put in the specifics that I am looking for from my quilt circle for do.Good Stitches this month.

I'd like to collect half-rectangle triangle blocks that measure 3.5" x 6.5" UNfinished. I'm also going for the super girly color combination of orange, pink and magenta (and if some red creeps in, that's okay too). 

So let's start with cutting a 4" x 7" rectangle from 8 different fabrics. Divide them into 2 stacks with fabrics all facing up, being sure to have a little contrast within each of the stacks, whether from color or value. The stacks don't have to be even, but you must have at least 2 rectangles for this to work. 

FullSizeRender.jpg

With one of the stacks, place your rotary ruler diagonally from the lower left to upper right corners. Mark a cutting line, or go ahead and cut on the diagonal. With the second stack, do the same thing, BUT place the ruler diagonally from the upper left to lower right corners this time (mirror image to the other stack).

I've only shown the cutting on one of my two stacks... cutting diagonally from upper left to lower right corners.

I've only shown the cutting on one of my two stacks... cutting diagonally from upper left to lower right corners.

Mix and match your pairings within each of the stacks. Flip the lower triangle up so that right sides are together and the long diagonal cut lines up. Stitch using a 1/4" seam allowance. Press seam allowance to one side.

FullSizeRender.jpg

Trim your rectangles to 3.5" x 6.5" doing your best to keep the seam lines exactly in the corners. You will end up with 8 different rectangle blocks.

FullSizeRender.jpg

If you are so inclined you may sew together individual blocks for larger blocks, but my aim is to mix them all up with different orientations, so I'm happy to receive the 8 separate rectangles without further piecing. Here's the direction I'm thinking of going with this quilt:

FullSizeRender.jpg

Thanks to my Bliss Circle mates for their contributions! I hope y'all have fun with this!

2017 Now, 2016 Was.

Wow, I knew it had been a long time since I've blogged, but I didn't remember just how long it had been!! This gives a good indication of the level of creating that happened for me over the last year --- not much.

It was a year of transitions (as every year is, of course), of shifted focus and of inertia. I packed up my amazing workspace on short notice, and haven't quite unpacked it fully.

Yes, that's a mattress serving as my design wall, in our second bedroom that's been converted into my sewing room.

Yes, that's a mattress serving as my design wall, in our second bedroom that's been converted into my sewing room.

I did very little quilting throughout the year, though put more practice into making garments, bags and sundry, mostly for Cool Cottons shop samples (and cute Alberta Street Pencil Skirts for me!).

IMG_4905.JPG
IMG_3902.JPG
IMG_4878.JPG

Earlier this week I decided to get back in the swing of things. I chose to lapse my membership with PMQG in 2016 (though honestly have been inactive for the better part of 2 years) for a number of reasons: discontent with the relations between the local guild and the national, lack of creative impulse, a disconnect from the community in general, among others. But recently I've been thinking that we now need to embrace the communities that mean something to us, those which we would feel the loss if they no longer were there for us. So Thursday morning I renewed my PMQG membership just hours before the first guild meeting of the year. And it seems like it was the right decision for me at the right time. The meeting Thursday evening left me feeling invigorated and inspired, with a sense of belonging that I didn't feel at the same events 2 years ago. I'm sure a large part of that is my own perception and attitude, but that just confirms for me that now is the time to reconnect and build these ties.

FullSizeRender.jpg

I won't make any promises that I will get back to blogging regularly, but I do intend to make an effort to get back to creating regularly, which will give me something to blog about ;) So, thank you to those who take an interest, and especially to my community of creatives who keep me inspired and make me want to contribute to the world they are creating.