Taking Some Time Off

I am sure that those of you who have been reading my blog off and on are aware that I have taken part in multiple virtual quilting bees over the last couple of years. I've not only taken part in, but have had an amazing experience, learned many new techniques, tried things I wouldn't otherwise try, and most importantly have met some absolutely wonderful individuals in the process!! I'd go so far as to say I've made some friends over the years (though haven't had the pleasure of meeting them all face to face yet)!

That said, I've made the decision to go into 2014 with less on my plate. Actually, that's inaccurate... I have new things on my plate that take precedence, and have made the somewhat difficult decision to take the year off from bees, with the exception of the do.Good Stitches Bee. I love the creativity that goes into them, the community that builds around them, and of course sharing our handiwork among friends. But I fear that I won't be able to be as diligent as I'd like to stay on top of the schedules.

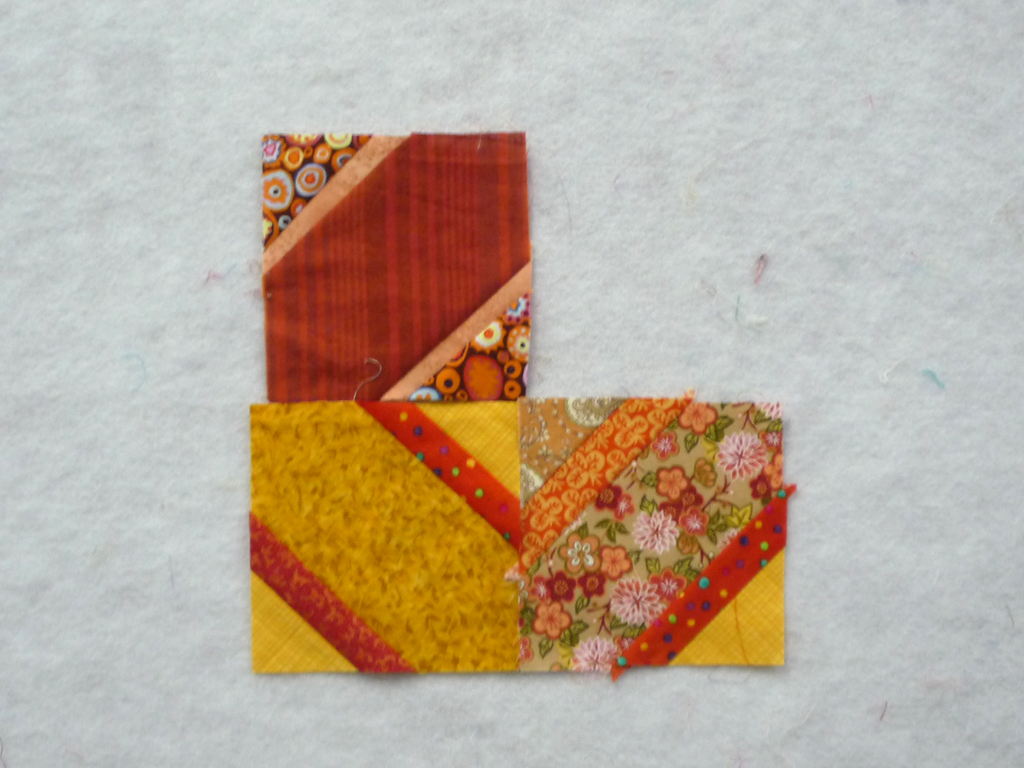
So, I guess you could say that today I made my final bee blocks for a friend. Jenn wrote up a tutorial on her blog SunnyInCal for these Wonky Braid Blocks. These were made using a paper foundation method, and though I struggled initially, once I got to the point of removing the paper it all fell into place.

And here's the brutal truth... out of something like 6 virtual bees I've been a part of in the last 2 to 3 years, I have finished ONE quilt. Granted, I have one other almost completely quilted and another ready to be quilted, but the others are in various stages of incompleteness. And I feel bad about that. So maybe it's time to take a breather. Maybe this will allow me to use some of the time finishing these UFOs instead of taking on more unfamiliar techniques. At least that's the plan. And if other projects fill in the void, I'll let y'all know!

International Quilt Festival, pt.1

In contrast to many other posts y'all may see born of this quilt show, this particular post is going to be short and lacking in photographs. The photos will follow soon once I get a chance to go through them and make sure I have all of the credits in order. 

But I will say that this was the first time I've been to this amazingly huge show. My mom has been attending off and on for many years and FINALLY convinced me to join her (the fact that it fell just days after my _0th birthday and so was coupled with a birthday mother/daughter getaway had a large influence, too). And I'm so glad it worked out! 

The whole experience was overwhelming. There is no question that one needs to ration one's time and spread it out over the entire long weekend in order to really absorb any of it. And the quilts on display definitely ran the gamut. Many absolutely stunning pieces of art, a few rather mundane works, and several mixed in that made me wonder how they ever got juried into such a prestigious show. A little for everyone, you could say.

And then there are the vendors. Vendors and vendors and vendors. That deserves a post all its own. Did I say overwhelming? 

Well, I took dozens of photos of some of the pieces that stood out to me the most, and look forward to sharing with you all some of the highlights in my opinion. Next post coming soon...

Making the Cut

I had said that I would share a little insight into how I approached making quilt blocks from the shirts and ties my aunt sent me last week. I still have a long way to go, but here's a peek at the beginning:

Starting with stacks of shirts and ties, just like this... 

P1060898.JPG

I decided to start small and work from sleeves to begin with.

P1060917.JPG

Using my shears I snipped through the hem near the inside seam (on the long sleeved button-up shirts I simply used my rotary cutter and sliced off the cuffs entirely) and then ripped up to the armhole seam. You can see how nice and on grain that is below.

P1060918a.jpg

From the natural stop at the armhole seam snip on the perpendicular and slowly rip again. The tear should carry you across the sleeve leaving you with a rectangle attached just by the original inside seam where you began (and will need to snip through with shears), and the curved part of the sleeve still attached to the rest of the shirt.

P1060920a.jpg
P1060921.JPG

Luckily for me the short sleeves allowed just enough fabric to get the 5" squares after trimming off the finished hem with my rotary tools. I pressed out the piece of fabric I now had to work with, and treated it like any other fabric yardage, cutting into the base units I would need for my blocks. 

P1060922.JPG

Now, on these short sleeved shirts I only got a few blocks to begin with, but I still have the whole breadth of the body of the shirt to work from as I need to make more blocks! And that one is a little easier to suss out cutting, dontcha think? 

Once I had a few of these cut down into 5" and 2.5" squares I realized that I didn't need to cut the smaller squares separately for what I was doing. Once I cut the 5" squares to the desired shape I would have the corner pieces to work with. 

P1060909a.jpg

So the next step was to start cutting the ties. But before I could do that I needed to disassemble them, which is a much more time-consuming process than one might think. I spent quite a bit of time with a seam ripper at the stitches closing the backs of the ties (and have only done about half a dozen so far) and then removing the stabilizing inserts. But once I had a few done I got started on cutting those little guys too. 

P1060923.JPG
P1060911a.jpg
P1060912a.jpg

Mixing up the little corner units I started in on stitching them down to the bits from the ties which will ultimately make up the accent strips in the blocks. I centered 2 triangles on the silky smooth rectangles, stitched down 1/4" from the edges and pressed. Then I squared up and sliced evenly down the center of the rectangles, leaving me with 2 corner units. 

P1060914a.jpg
P1060915a.jpg
P1060916a.jpg

Now the trick for me is to step away from the sewing machine for a bit. Now that I have at least worked out the process and dimensions confidently I can go ahead and really make a dent in the piles of fabric (still all sewn into things called shirts!) and get a good chunk of squares cut. The more options I have, the better the mixing and matching will be when I am ready to sew the units into blocks. 

Oh, and a little side note... have any of you all tried quilting with ties before? I was not prepared for the challenges that working with slick nylon or polyester or silk ALL CUT ON THE BIAS would bring. Any tips or anecdotal experiences? Please share! 

Adapting

Sometimes adapting someone else's pattern or tutorial to get exactly what you are looking for is a cinch.

Sometimes, not so much. 

As I mentioned in my previous post, I'm embarking on a project based on Little Miss Shabby's Hugs & Kisses block tutorial.  However, I needed to adjust the tutorial ever so slightly for 2 main reasons, both based in the fact that I am using clothes and ties for the blocks: her technique creates WAY too much waste if one has a finite amount of material to use; since I'm using ties for the accent strips, I can't cut full squares for that .75" strip just to throw out the rest.

So I did some test runs. 

P1060903a.jpg

Starting with that same 5" square for the main part of the block unit I tested combining the accent strip and corner triangles a little differently. Just guessing at appropriate dimensions, I cut a rectangle of what would become the accent strips. I think I started with a 2.5" x 5" rectangle. Then taking a 2.5" square for the corners, I cut it once on the diagonal and placed a triangle centered on each of the long sides of the rectangle, stitching each down 1/4" from the edge. Pressed them out and trimmed so that I had a square measuring about 3.5" (I think). 

P1060904a.jpg
P1060905.JPG

Instead of lining up the pieced square exactly with the raw edge of the base, I offset it by approximately 1/4" so that I could use both sides of that block equally. However, something in the "approximately" made for less-than-uniform outcomes. In 3 test blocks I did with stash fabrics, each containing 2 corner units, I think I had at least 3 different widths of accent strips show up.

P1060906a.jpg

But each of this little testers added up did exactly what they were intended to do – help me figure out a formula by which to cut and piece the blocks for the memory quilt. So I got bold and started cutting into the clothing my aunt sent me last week. And voila! The first 4 completed units! 

P1060925a.jpg

In a few days I'll try to publish a post that illustrates how I ended up making these guys and shows how I worked with the shirts and ties to make them usable yardage (not quite as adeptly as the inspiring Luke Haynes!), but for now I'll just say I think I found my groove. Which is good since I have lots more of these to do!

Some personal projects

I found out this past week that I did not get into the craft fair I had applied for. It may be a blessing in disguise. A new project has cropped up unexpectedly - a memory quilt for my aunt and her step-kids (who aren't kids anymore, of course). Possibly even two quilts. 

only a portion of the shirts my aunt sent me...

only a portion of the shirts my aunt sent me...

My uncle passed away unexpectedly after complications from a surgery. My aunt seems to be keeping it together much better than I could imagine, but thankfully has a great support system too. She asked me if I'd be up for making a memory quilt from his ties and shirts that she can give his kids for Chanukkah. Of course I said, "yes" though that was before I learned of the proposed deadline ;-) So I reiterate, it may be a good thing that I don't have the craft fair to worry about finishing all of that holiday inventory I have been spending my time on. 

After looking through the box of clothing she sent, I wasn't sure what approach I would take for this. Then I was browsing Pinterest over my morning coffee just today and saw a picture that I had seen months ago on Debbie's blog, A Quilter's Table.  The first photo, the Hugs and Kisses block, on her 2nd quarter Finish-A-Long post inspired me even before having this project.

Low-Volume Hugs & Kisses block

But when I saw it in the context of this memory quilt, something just clicked. Debbie linked to the tutorial she used, written up by Little Miss Shabby.

P1060902.JPG

Can't you just picture a quilt with these great prints on the blocks?? And those accent strips are perfect for the ties! 

P1060901.JPG

This is a new venture for me, but one I am glad to be able to take. However, I will admit, taking the first cut will be the hardest. 

Give it some thought first

Over the weekend I managed to quilt a do. Good Stitches quilt that's been hanging around for a few months too long. It felt good to finish the quilting, let me tell you! 

And then it was time to choose the binding. 

I made a mistake that I may have made in the past, but has never seemed quite so glaringly obvious and yet so easy to pass over at the same time. I chose the binding fabric solely to match the backing fabric. 

P1060816.JPG

They look great together, don't they? Well, even before I cut the strips, pieced them all together, pressed and sewed it down to the quilt, I auditioned several fabrics. And I THOUGHT this one worked. I mean, it does work, but, well... let's just say it acts as more of a frame than this quilt might need. 

P1060818.JPG
P1060815.JPG

I am going to withhold final judgement until I finish and can get a good look at the whole thing, deeming it way too late to make any changes at all! I actually like the color with all of the pieced blocks and even with the setting triangles, I just hadn't accounted for the bold contrast reading like the wallpaper I had in my bedroom when I was 4 years old.

And that's the story in a nutshell. 

Mosaics for a new season

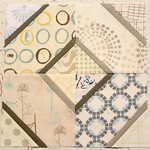
Browsing through Flickr late on Wednesday I noticed some beautiful, simple and serene photo mosaics put together by Rachel {Stitched in Color}.  I think what really caught my eye is that one of the photos she included is pinned to a Pinterest board I have on color inspiration, and helped inform the palette for my Friends + Fabric 2 Bee quilt earlier this year.

Blocks from all 11 members of the bee... which I still sadly have yet to add to in order to finish the top.

Blocks from all 11 members of the bee... which I still sadly have yet to add to in order to finish the top.

The mosaics were given a poetic title, Washed Earth, and as she usually does, Rachel had put a link to a blog post under each of the photo mosaics in her photostream. Even though the work day was coming to a close and it was almost time to close up shop I followed the link. Her post, found here, was introducing a new challenge hosted by Pink Chalk Fabrics.

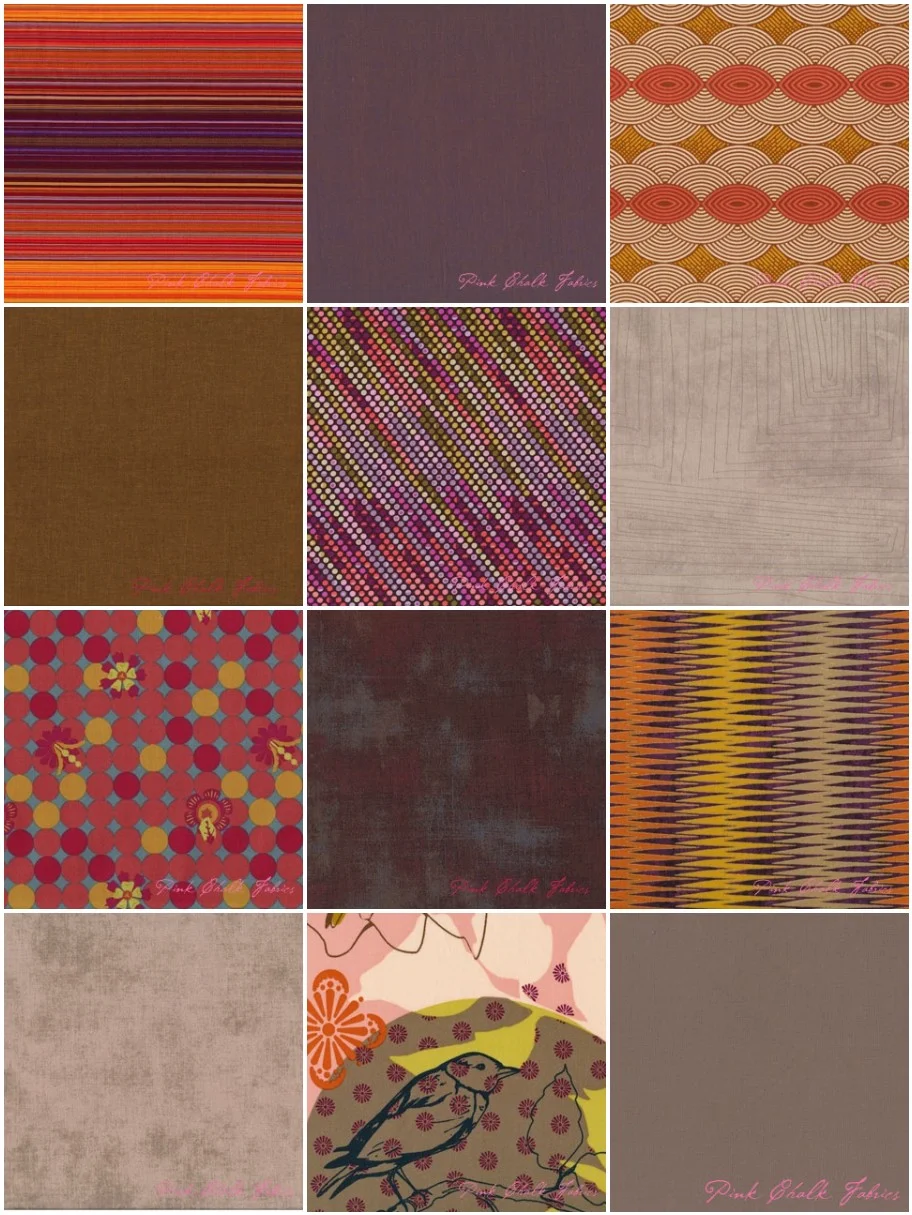
The challenge is a fabric mosaic challenge, bringing together 12 fabric thumbnails from the Pink Chalk Fabric website to express one's interpretation of the phrase Washed Earth. Now, THIS is a challenge I can have fun with! Combining colors and prints for an overall feeling... one of the few things I feel I truly excel at. There are prizes involved, including a fat quarter bundle of their selected fabrics for the winning mosaic-makers, and really it's just a fun distraction to welcome the sights and smells of autumn rolling in (at least in this part of the US). There is a link on Rachel's blog post which will be open through October 3rd, and each participant is welcome to add up to 2 mosaics.

So a full day or so after I saw the blog post, I came home, poured myself a glass of wine and hunkered down on the sofa with 3 tabs open on my computer browser and started to play. One tab was dedicated to the Bighugelabs Mosaic Maker, one to Pink Chalk Fabric's site, and another to Pinterest, just because. I was toggling back and forth, cutting and pasting image links, previewing what was developing in my mosaic, moving things around and taking them out completely... until I had ended up with 3 different mosaics!

Mosaic #1

Mosaic #1

Living here in Oregon, the washed earth still contains plenty of green, but those richer browns and reds come out too. In a way this is still my favorite of the three attempts, but also may not be among the ones I submit, since there is something just a little disjointed about it. It might be the intensity of the two Jane Dixon prints in the center, the pebbling patterns. I love them and think they speak volumes, but those volumes might be a bit strong for this. So, on to the next one - swinging very much in the opposite direction!

Mosaic #2

Mosaic #2

Now, some of those yellows and greys had shown up in the first mosaic, and I realized when I first viewed it with the images that I really had two completely different color stories going, so I made a simple text document with each of the image URLs copied onto it, dividing the stories into two separate lists. This one says a little more to me about the contrast of less saturated colors in the dimming light and the deepening of the golds as leaves and flowers and vegetables left on the vine too long turn away from their summer glory. 

Mosaic #3

Mosaic #3

But I think it took one more thorough browsing of the Pink Chalk Fabric site to find my rhythm and bring together a palette that is so very much my taste. I'm an autumn baby, with the autumn complexion and color tastes, and these dusky, earthy tones make my heart sing. Even though I will profess until my breath runs out that I do not like purple, the plum and burgundy hues have been creeping more and more into my artwork and my wardrobe. Just sayin'. 

So those of you with a fabric obsession who enjoy putting stacks together just for the sake of the exercise should visit Rachel's blog and get in on the fun. And for those of you who find inspiration in color and other people's interpretations on the same theme, there are some amazing mosaics already linked at the bottom of the post! One could spend hours just taking in the eye candy.

Finally a Finish! Kinda...

After months and months of gathering, piecing, playing, rearranging, absorbing, more piecing, etc., etc. I have a completed quilt top. 

Yes, I am so happy with the results! And yes, I am also happy that this photo is the LAST TIME this quilt will be up on the design wall EVER! So happy!! 

I stopped marking the journey, because well, it was slow-going. I had all of the elements with which to work, it was just a matter of breaking them down into the right combinations and putting it back together. That took a LOT longer and more consideration than I had anticipated. For a style of quilt that I love, the process was at times very frustrating.

Going from the independent strips, combining into strip sets like this: 


over and over and over again... making piles like this:

P1060106a.jpg

and more strips... 

and so on and so forth. 

I think you all get the idea. This went on for weeks, then months, adding more triangles to the mix, but not piecing anything together until the bulk of the composition was established. And this whole time it stayed on the design wall. 

Which I knew would pay off. I eventually got confident enough with the core body to begin sewing my diagonal rows together, then started building along the 4 sides to ultimately reach queen size. I figured, once the top came edge to edge on my 8' square design wall, then I had reached my goal.

IMG_0447a.jpg

I'm not yet sure how this will be quilted, but I know it won't be by me!! Even if I had the capacity to quilt a 100" square quilt, it would take me another 5 months to finish, and that would be a very dark cloud over me. So this is one of those situations where I admit my limitations and will call in some help. Another thing I know is that once it's quilted I will be trimming off the points on the sides. But I'll worry about that stage when we get there.

But for now I intend to fully enjoy having my design wall back in all its 8' glory!!